When your primary objective is to showcase your website in a spectacular way to keep your page ranking higher on Google and bringing you income, this is the last thing you want to show your site visitors.
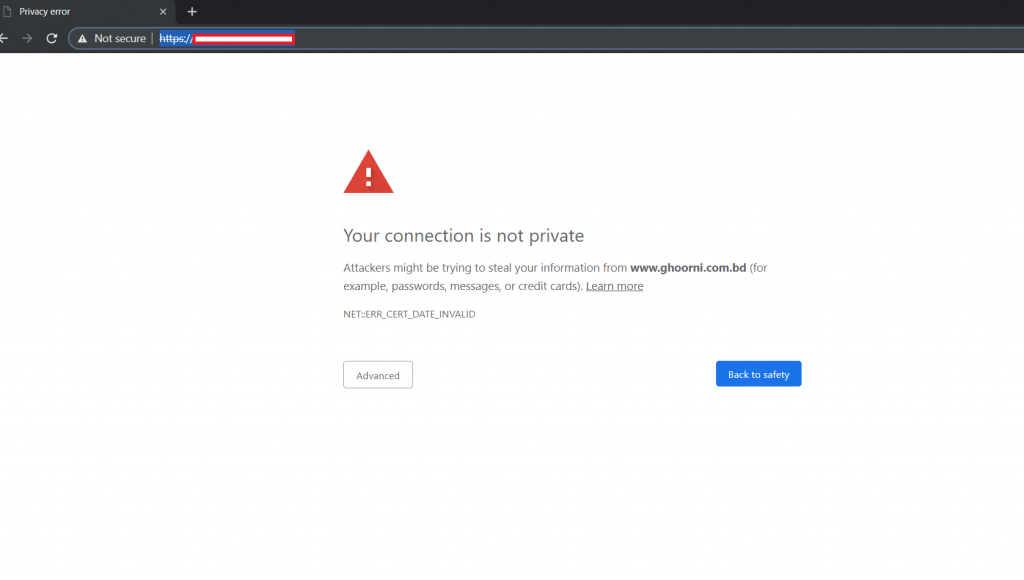
Google Chrome, the most used browser, marks websites as “NOT SECURE” if you do not have SSL integrated with your site. As a result, having an HTTPS connection is a must in order to avoid such a situation.
In this article, We are going to show you a step-by-step guide on how to install SSL certification on your website for free. This blog will be helpful for those who do not know about SSL or How to get one.
What is SSL?
SL stands for Secure Socket Layer. SSL creates an encrypted layer of data transmission between the two systems. Whether it is server to server communication or server to browser communication, SSL allows encrypted data transmission and prevents its access to an outsider. For creating an SSL connection, a server needs an SSL certificate. you may have noticed that the website started with HTTP:// or HTTPS:// with a little green padlock, and these are the end products of the SSL/TLS layer we mentioned earlier.
Why do you need SSL?
There are two main reasons to have an SSL certificate, to enhance Security and get a better rank in google search results.
Security
From summer 2018 Google Chrome has started to mark websites as “Not Secure” if they do not provide an HTTPS connection. Sequentially, the browser does not let the customer visit the “Not Secure Website” and as a result, It’s enough to drive your potential customers away for fear of identity theft or a data breach.
Better SEO
In 2014, google informed webmasters that SSL was going to be incorporated as one of their ranking factors. Trying to give your websites a boost to get them high rankings with Google is an insanely competitive market, and having an SSL certificate for your website is a quick and easy way to accomplish this.
How to get an SSL Certificate:
To have an HTTPS Domain name, you need an SSL certificate from a CA(Certificate Authority). You can use Let’s Encrypt to get an SSL certificate and make your website secure for free.
There are two common options for integrating SSL, one is your hosting provider and the other is a WordPress plugin in case your site is built on WordPress.
Hosting services such as Bluehost, Dreamhost, Godaddy, Siteground, WPengine, and many other services let their customers create an SSL certificate with Let’s Encrypt on their CPanel. On the other hand, you can use plugins like WP Encrypt to create your SSL certificate. Unfortunately, using these plugins for SSL is not recommended as these can be considered as the potential crack of your site.
If Your hosting provider does not provide you free SSL certification, this article is for you. We are going to show you the step-by-step process of creating free SSL and installing it on your website.
STEP BY STEP GUIDE TO INSTALL LET’S ENCRYPT FOR FREE
- STEP 1: Go to https://www.sslforfree.com/ and put your website address (URL) on the given from and click on ‘Create Free SSL Certificate’

- STEP 2: If you are not logged in or not have previous account on ‘SSL FOR FREE’, You need to create an account in this step.
- STEP 3: After login you will be redirect to your dashboard. Enter your domain again and click ‘Next Step‘
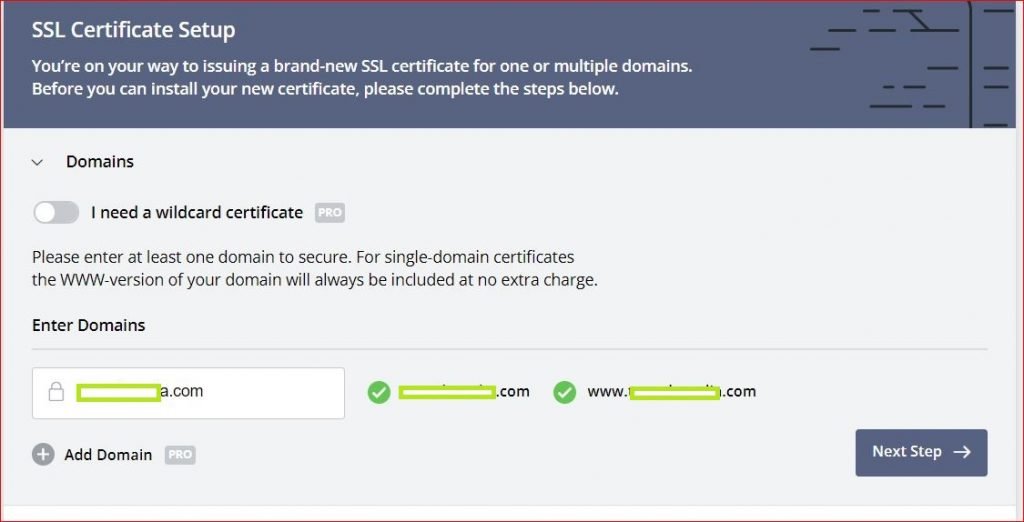
- STEP 4: Click on ‘90 days certificate‘ and click the ‘Next Step’ Button again. You will see the ‘Auto Generate CSR‘ checkbox is checked and you click the Next Step Button again.
You will see the all pricing packages Since you need a free one, you don’t need to do anything. Go to next step. - STEP 5: In this step you need to verify your domain authority. There are 3 methods, the best one is to select the ‘HTTP File Upload‘. Follow these steps:
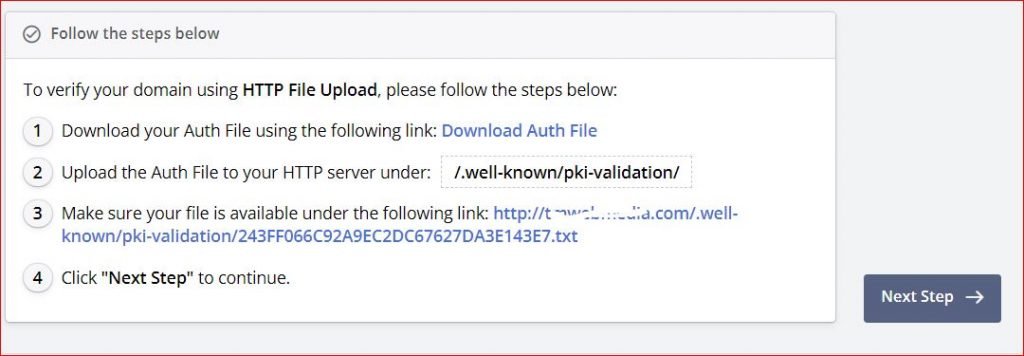
You need to download an HTML file by clicking the given link. The Go to your cPanel File Manager > Public HTML.
First Create a folder named ‘.well-known’.
Then Create a sub folder inside the ‘.well-known’ folder and name it ‘pki-validation’.
Inside ‘pki-validation’ folder you need to upload the downloaded HTML file.
After that click on the second link to recheck if your upload is correct.
Click on next step.
- STEP 6: Now click on ‘Verify domain‘ and you will see a success message.
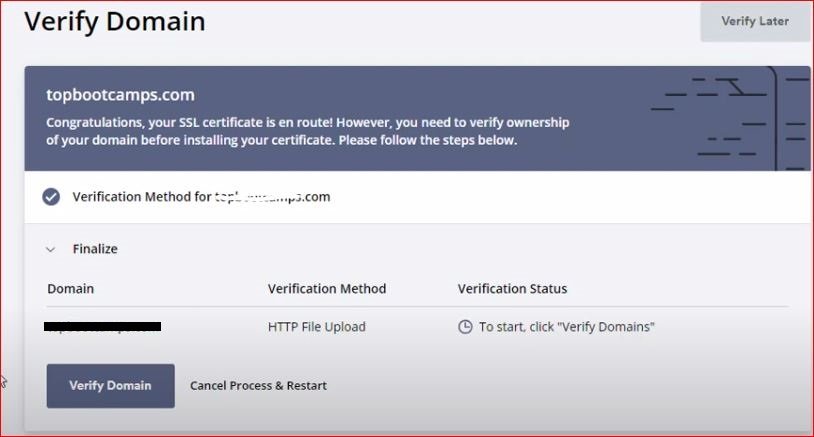
- STEP 7: Wait a few minutes to let the site generate your certificate. Once it is generated you will see another success message. Now, you are going to install the certificates.
First, select cPanel on ‘Server Type‘ dropdown.
Second, Click ‘Download certificates button‘ to download the certificates and go to next step. - STEP 8: The Downloaded zip file one the previous step contains 3 files, 1. ca_bundle 2. certificate 3. Private key.
Extract these file and keep it in a folder where you can use them on the next step. - STEP 9: Go to your cPanel and click ‘SSL/TLS’
Click on ‘Manage SSL Sites‘
Select your Domain (Where you want to put SSL).
Copy and Paste the contents of each file you downloaded on the previous step on the corresponding boxes.
There are three box for certificate, private key and ca_bundle. Fill them up.
TIPS: You should open those 3 files with notepad to copy the contents.
Now, click on Install Certificate button.
That’s it. This is how you can install a free SSL Certificate on your website.
Please remember that your SSL Certificate from the SSL for free is valid for 90 days. After the validity is expired you need to reinstall it by following the same proccess.

Leave a Reply